I’ve always loved Oak furniture, so when a friend of ours offered us a solid oak dining table that was in need of a bit of attention, we took him up on his kind offer without a thought. It came complete with 8 matching Oak chairs with wicker seats and was clearly in need of refurbishing to bring the wood back to life. We considered having the table professionally stripped, sanded and polished but decided to undertake as a DIY project instead. It was very easy, but more importantly very rewarding to see the results! In this post, I share the experience with some tips if you decide to undertake a similar project.
After some reading and research on the topic about grades of sandpaper and finishes, I set about to sand down the table using an electric belt sander armed with some 60 grit sand paper. This was enough to takes off most of the old varnish but required several paper changes as it did clog up quite often – I used a relatively inexpensive sander from Wickes which I already owned and had used to sand down some interior doors.
The corners and edges were sanded by hand to remove the old varnish properly and although even the whole table could have also been done by hand, it would have been extremely time consuming (not to mention tiring) and the finish using a belt sander is also going to be more even, so I’d definitely recommend investing in one if you don’t already have one. Once the varnish had been removed from the table top and base, I used a 100 grit paper which is less course and provides a smoother finish for the table. I set about sanding the entire table using this grade paper, again hand sanding the edges and corners. Although many websites out there recommended using an even finer 120 or 150 grit paper for final finishing, I felt the 100 grade provided a perfectly good finish and also left the surface good enough to soak up the oil I had selected to apply.
If, like me you’re interested in a natural finish for your dining table, you will have no doubt done some searches for the difference between varnishes, oils, stains and waxes and what the best product is for you. Like many things in life, I’m afraid the answer you will find is, ‘it depends’. I decided to go with an Oil finish and chose a ‘Clear’ Osmo Oil with a Matt finish similar to one I’ve used before on Kitchen worktops.
As the name suggests, this oil leave a Matt finish rather than a the sheen you get from a satin finish. You’ll see that Osmo do have both Matt and Satin finishes available and its simply a matter of preference which one you go for.This oil brings out the natural colour of the wood and accents knots and imperfections to provide a truly natural finish. What you must remember is that ‘Clear’ or ‘Natural’ doesn’t mean what it says on the tin when it comes to untreated bare wood as the wood will always soak up the oil making the appearance slightly darker. Some oils may bring up the wood darker than desired, so as always recommended, so do try the oil on a small section first. One good test is to brush some water onto a section of the table as this will give a good indication of what it will look like with a clear oil applied.
I applied the Osmo oil across the table using a lint free cloth, always working in the direction of the grain as advised on the tin. This process was extremely quick and took a fraction of the time it took to do the sanding. As with most DIY tasks, its all in the preparation! After the 1st coat was applied, it was simply a waiting game before applying the 2nd and 3rd coats. The Osmo TopOil provides a durable and hardwearing finish which is also water-resistant. However, add an extra layer of protection, I decided to apply a hardwax across the table top itself.
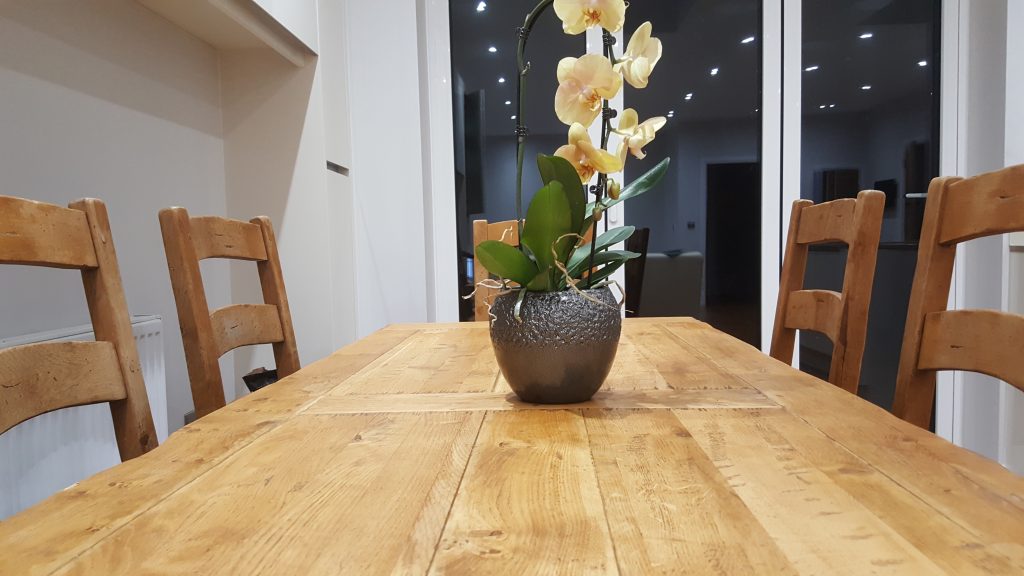
There a number of beeswax products out there for finishing natural wood and I chose one recommended to me called Briwax Finishing Wax, which I was more than happy with as it was easy to apply and provided a great finish. I applied the wax as recommended with a soft cloth, working it into the wood and then buffing to provide a slight sheen. Further buffing and additional layers of wax would provide a higher sheen but because I was looking for a Matt finish, I restrained from buffing too much to achieve the finish i was looking for. The final result is one i’m extremely happy with!